Track a Custom Business Event
This example shows how to track data by using the Custom Business Event component.
Use case
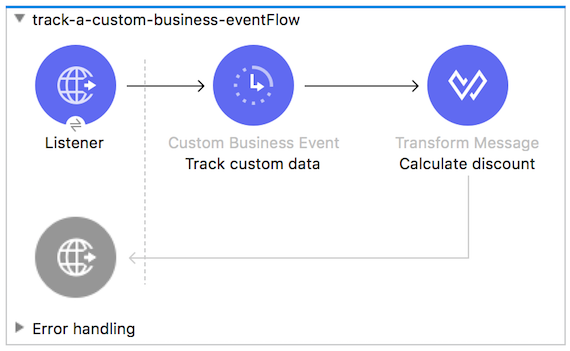
Data about an order is sent in JSON through an HTTP endpoint to a DataWeave transformer. A custom DataWeave transformation is used to calculate the discount that is offered for a certain product type. The Custom Business Event keeps track of the item name, number of units, and price per unit for the order data.
Set up and run the example
- Import the Track a Custom Business Event project into your workspace
- In your application in Studio, click the Global Elements tab.
- Double-click the HTTP Listener config global element to open its Global Element Properties panel. Change the contents of the Port field to required HTTP port: 8081
- Right-click the project folder and select Anypoint Platform > Deploy to CloudHub.
- In the Deploying Application window that opens, click Insight, and then select Metadata and Replay.
- Click Deploy Application.
- Use Postman to make a POST request using JSON to
http://(your domain).cloudhub.io/customBusinessEvents:
The response body should contain price per unit with the applied discount (-15% for shoes):{ "email": "aaa@abc.sk", "item name": "shoes", "item units": 2, "item price per unit": 10, "membership": "free" } - Go to your Cloudhub account and click the Insight tab in the left panel to see that your custom business event was logged.